
OK, So DSM 6.0 has launched for almost half a year, so far I still can’t find any resource on how to setup DSM 6.0 on a real machine. But there are a couple of online resources mentioned that it is possible to install DSM 6.0 on a virtual machine. But first thing you need are:
- VMWare Player : 12.5.3 build-5115892
- DSM 6.0 Bootable virtual machine files : https://mega.nz/#!edUjRRhD!r-jBC-PTM0GMfDcxTiWsCcb6V9fbC_Iyg6zZQKSQcLg
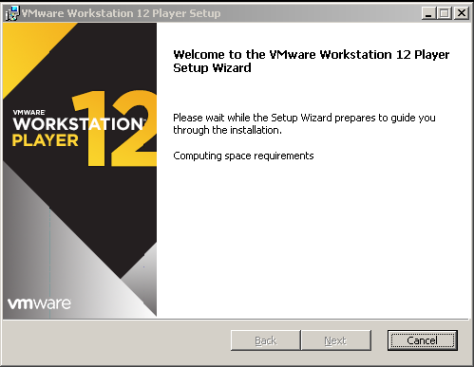
Install VMWare Player
The first task of course is to install the VMWare Player. Basically it is a free virtual machine player to plug and run any existing virtual machine. You can’t create a new virtual machine here, but can re-run and modify existing virtual machine that saved by others.
Extract the DSM 6.0 Bootable virtual machine files
Unzip the entire zipped file, probably best to extract to C:\DSM6 drive for now. So you would see 6 files like below.
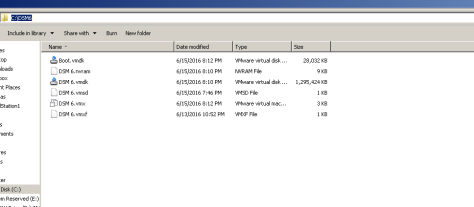
These files are very important, make sure you don’t simply change or rename all the virtual machine files.
Open and run the virtual machine using VMWare Player
Next important step is to open the VMWare Player and look for C:\DSM6\ directory. And search for DSM 6.vmx file.


Click “Open” and you will see that the “DSM 6” virtual machine is attached with your VMWare Player.
Modify the network settings
It is important to modify the network setting of the virtual machine. By default the virtual machine use NAT, in order for you to able to connect to the DSM 6.0, you have to change the network setting to “Bridge adapter” instead.

Adjust the virtual machine processor and memory
Change the processor to 2 cores at least, and memory to 2 GB.

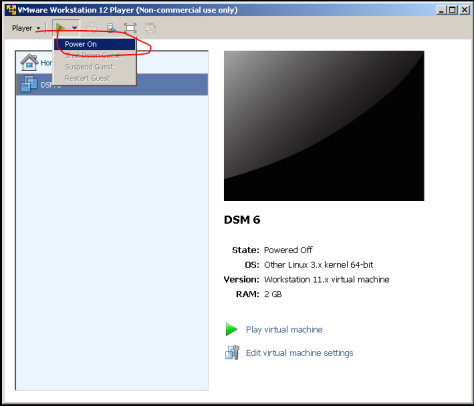
Power On the virtual machine
Pick power on from the drop down list or double click to run the virtual machine. A prompt will shown to double confirm if the virtual machine has been moved here, or copied here. Pick “I copied it”

Booting the DSM 6.0
DSM 6.0 will boot up in a few minutes, but the next thing is to figure out what IP address you need to connect to DSM 6.0. Easiest way is to access your router and look for new DHCP devices that connected. So from the screen you can see that the DSM 6.0 is 192.168.0.105.


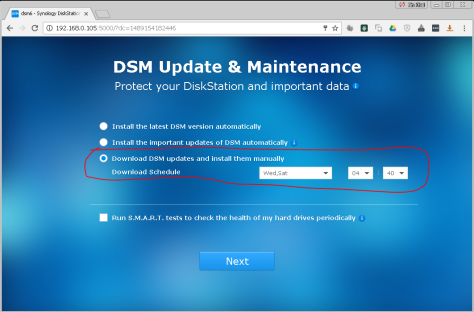
Access to the DSM 6.0 via IP address
Access to http://192.168.0.105/ And you will see the system is getting ready, this will take a couple of minutes.

After that you will see the “Create your administrator account” screen.


Avoid picking up any automatically installation on DSM version, this will screw up your DSM 6.0 in future. Choose “Download DSM updates and install them manually”
Bingo!
This is awesome. The screen looks similar like DSM 5.2, but the design definitely looks better.

Feel free to comment here if you need any help.

Follow your steps.
But still freeze at ” booting the kernel “
LikeLike
wait for a couple of minutes.
LikeLike
thanks, it already boot.
LikeLike
I noticed this DSm 6.0 in virtual machine took more time to boot compare to what I did for DSM 5.2 in virtual machine.
Probably because of the boot issue.
The next blog I will show you guys how to setup a RAID 1 in virtual machine, testing to tear down one of the HDD and install a new HDD virtual disk to make the Raid recovery.
Stay tunes.
LikeLike
Can you convert to hyper-v? i have tried to convert the files myself, i am able to get to booting kernel but nothing beyond that. i have it booting from the converted boot file and assume the issue is with it accessing the dsm 6 file after the boot file runs.
LikeLike
Sorry, i never did it with hyper-V before.
LikeLike
how did you compile the vmware file? if i can get an iso copy of the boot manager and dsm i should be able to just create my own hyper-v from scratch
LikeLike
I am not the first person that created that.
Someone did that and uploaded the vmware file online.
LikeLike
Have you had any luck updating the DSM OS? I get an error 21 every time, whether its through the auto upgrade function or the manual. I even downloaded several different step upgrades from the Synology site but get the same error.
LikeLike
same here – would be nice to be able to update the OS – if anyone has an idea… 🙂
LikeLike
Hi,
Im triing to run the VM on ESxi. Is there somthin spezial to change?
VM doesnt Start. Disk Type scsi not recognised.
LikeLike
I can run the VM when the Network Adapter is set to Bridge, but when I import it to GNS3 (using vmnets) and connect it to a VLAN that has DHCP it cannot get an IP.
I can tell that my DHCP is working because when I put a VM and connect it to the same port where the DSM6 was used to be connected, I can get an IP.
LikeLike